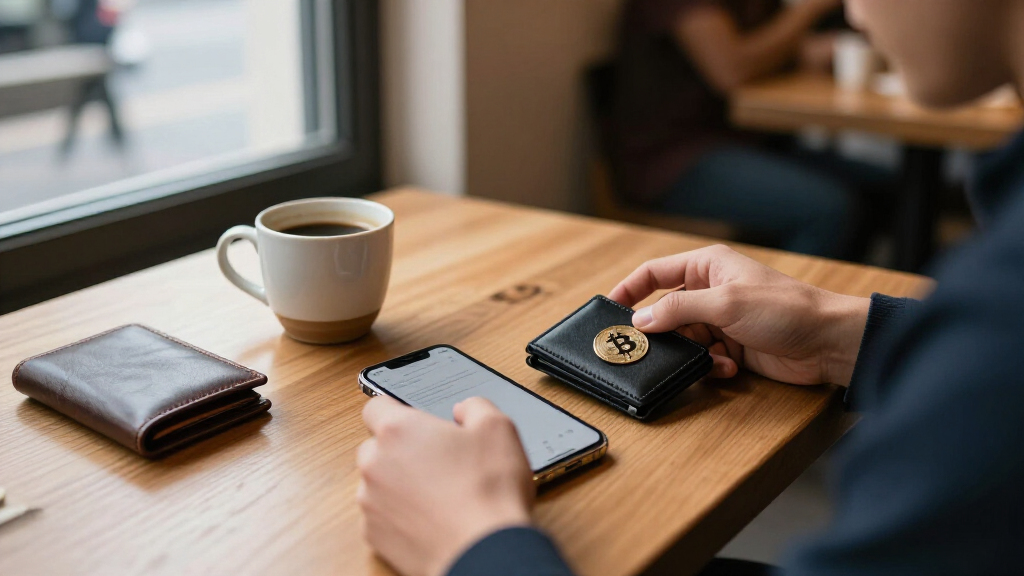
Set up a Bitcoin hardware wallet so you can hold your private keys offline, back up access, and check that receiving and sending work with a small test transaction. This guide is for beginners who can install software and follow on-screen instructions; allow 45–90 minutes, plus time for network confirmations. Your wallet is ready when its recovery backup is recorded securely, the device shows the same receiving address as the companion app, and a small test payment arrives.

Get hardware and tech essentials delivered free with Prime
- Fast, free delivery on millions of items
- Prime Video, Amazon Music and more included
- Member-only deals all year

Trezor Safe 3 Crypto Hardware Wallet, Cosmic Black
- ✔ Model: TS3
- ✔ Security: EAL 6+ secure element
- ✔ Display: OLED screen

Blockstream Jade Bitcoin Hardware Wallet
- ✔ Screen: Full-color with QR code support
- ✔ Transaction support: Camera for air-gapped transactions
- ✔ Software: Open source

Tangem Crypto Wallet, 2-Pack
- ✔ Pack size: 2 cards
- ✔ Connectivity: NFC
- ✔ Supported blockchains: 90+
Difficulty: Beginner | Time: 45–90 minutes, plus time for Bitcoin network confirmations
What You’ll Need
Tools & Materials:
- A Bitcoin hardware wallet from its manufacturer or an authorized seller
- A computer or phone compatible with the wallet
- The manufacturer’s official wallet app, downloaded from its official website or verified app store listing
- Pen and the supplied recovery phrase cards, or another backup method recommended by the manufacturer
- A small amount of Bitcoin for a test payment and network fees
Knowledge:
- Basic use of a computer or phone
- Ability to follow device prompts and recognize a Bitcoin address
Plan to complete setup in a private place with enough time to check each screen. Bitcoin transactions can be irreversible: verify addresses and amounts on the hardware wallet display before approving. Do not share your recovery phrase with anyone or enter it into a website, messaging app, or computer form. A hardware wallet does not protect against every scam, loss, theft, or device failure.
Trezor Safe 3 Crypto Hardware Wallet, Cosmic Black
Trezor Safe 3 takes our top spot because it brings together two useful parts of a Bitcoin custody routine: an OLED screen for on-device confirmations and Multi-share Backup for recovery. Compared with Tangem, it has a dedicated wallet display rather than relying on a phone tap to access the card. That makes it a strong middle ground for buyers who want a conventional hardware wallet interface without choosing a device primarily for air-gapped use.For a Bitcoin holder, the screen matters because the product description says confirmations happen on the device itself. That gives us a separate place to review an action before approving it. Jade also offers a screen, and adds camera-based QR transactions and open-source software, so it may suit users who put those specific capabilities ahead of a broader everyday balance. Trezor’s product details, by contrast, emphasize a wide asset range and a named recovery option.The tradeoff is a setup process listed at about 15 minutes, and there is no touchscreen mentioned. Buyers wanting a tap-and-go card or camera-based air gap may prefer Tangem or Jade respectively. We also shouldn’t infer more about the Multi-share Backup workflow than the listing provides; buyers should make sure its recovery approach suits their own backup plan. For most readers who want an all-around device with screen-based confirmations, though, Safe 3 is the most balanced starting point.
Pros:
- OLED screen supports on-device confirmations.
- Multi-share Backup is included as a recovery option.
- EAL 6+ secure element is specified.
- Supports Bitcoin alongside thousands of other assets.
Cons:
- Setup is listed as taking about 15 minutes.
- No touchscreen is mentioned in the product details.
- The listing does not explain the Multi-share Backup workflow in detail.
Best for: Bitcoin holders who want on-device transaction confirmations and a stated multi-share recovery option in a traditional hardware wallet.
Not ideal for: Buyers who prioritize a camera-based air gap, a touchscreen interface, or a minimal phone-tap form factor.
Bottom line: We recommend Trezor Safe 3 as the strongest all-around Bitcoin choice here for its combination of screen-based confirmations and a named recovery feature.
“We recommend Trezor Safe 3 as the strongest all-around Bitcoin choice here for its combination of screen-based confirmations and a named recovery feature.”
Blockstream Jade Bitcoin Hardware Wallet
Blockstream Jade is the most distinctly Bitcoin-oriented pick in this lineup. Its camera and full-color QR-capable screen support air-gapped transactions, giving users a way to move transaction data without making a direct cable or Bluetooth connection the only path. The product also lists open-source software, rate-limited PIN protection, a virtual secure element, and Anti-Exfil Protection. That collection makes Jade a more specialized choice than Trezor Safe 3, whose listing puts greater emphasis on the OLED confirmation screen and Multi-share Backup.Jade also leaves room for more than one routine: it lists USB-C and Bluetooth, alongside QR transaction support. We can choose the connection style that fits the task, while the camera-based flow is the reason to pick it over the more straightforward Trezor. Compared with Tangem, Jade offers a screen and several connection options rather than a phone-first NFC card, but that flexibility comes with a device that has a 240 mAh battery.The product information identifies a virtual secure element, but doesn’t provide enough detail here to compare its implementation directly with Trezor’s EAL 6+ secure element. Nor does it describe the recovery process, so buyers should investigate that before settling on Jade as their long-term Bitcoin wallet. Its small listed memory capacity is not, on its own, a useful measure of Bitcoin security or suitability. Choose Jade when air-gapped QR transactions and open-source software are priorities; choose Safe 3 for the more clearly specified combination of device confirmations and backup.
Pros:
- Camera supports air-gapped transactions.
- Open-source software is specified.
- Includes rate-limited PIN protection and Anti-Exfil Protection.
- Offers USB-C, Bluetooth, and QR-based transaction options.
Cons:
- Requires a battery, with a listed capacity of 240 mAh.
- The supplied details do not describe its recovery process.
- The virtual secure element is not directly comparable from the listing to Trezor’s stated EAL 6+ certification.
Best for: Bitcoin users who specifically want open-source software and camera-based QR transactions for an air-gapped workflow.
Not ideal for: Buyers who want a clearly described recovery method in the product listing or prefer a wallet that does not depend on a battery.
Bottom line: Jade is our specialist choice for Bitcoin holders who value open-source software and camera-based air-gapped transactions over a more fully described backup workflow.
“Jade is our specialist choice for Bitcoin holders who value open-source software and camera-based air-gapped transactions over a more fully described backup workflow.”
Tangem Crypto Wallet, 2-Pack
Tangem’s two-card wallet is the simplest form factor in this comparison: tap a card to a compatible phone using NFC, with no cables, Bluetooth, batteries, or setup described in the product information. For Bitcoin owners who want a small device they can keep separately from their phone, that makes everyday access feel different from carrying Jade or Trezor Safe 3. The included second card also gives us a spare as part of the package, whereas Trezor’s backup is described as Multi-share Backup and Jade’s listing does not specify a recovery method.Its toughness claims also distinguish it from the screen-based devices. Tangem lists IP69K water resistance, shock resistance, a temperature range from −25°C to 50°C, and a stated lifespan of up to 25 years. Those details may appeal to someone seeking a durable card, but they do not replace the transaction-review role a display can provide. Unlike Safe 3 and Jade, the supplied description does not mention an on-device screen for confirming Bitcoin transaction details.The main constraint is that NFC access requires a compatible phone. A buyer who wants to use a desktop-centered workflow or independently inspect details on a wallet display should look first at Trezor or Jade. Tangem’s broad support for assets and blockchains may matter to multi-asset owners, but Bitcoin-only buyers should focus on the two-card backup and phone dependency. It earns a place for compactness and durability, not for the most detailed Bitcoin-specific transaction controls.
Pros:
- Two cards are included, providing a second card for backup.
- Stores private keys offline and uses NFC phone access.
- No cables, Bluetooth, or battery are required according to the listing.
- IP69K water resistance and a broad stated operating temperature range.
Cons:
- Requires a compatible phone for NFC access.
- No wallet display or on-device transaction confirmation is described.
- The supplied product text does not detail how the second card is configured for recovery.
Best for: Bitcoin holders who want a durable, pocket-sized card wallet, a second card in the pack, and convenient access through a compatible phone.
Not ideal for: Users without a compatible NFC phone or buyers who want a wallet screen for transaction confirmations.
Bottom line: Tangem is the most compact and durable-feeling option here for phone-first Bitcoin access, provided we are comfortable relying on NFC and a compatible phone.
“Tangem is the most compact and durable-feeling option here for phone-first Bitcoin access, provided we are comfortable relying on NFC and a compatible phone.”
As an Amazon Associate we earn from qualifying purchases.
Before You Start
Use the manufacturer’s official instructions for model-specific steps and supported Bitcoin address types. Buy the device from the manufacturer or an authorized seller. If the package appears opened or the device arrives with a recovery phrase already printed or filled in, stop and contact the manufacturer; generate a new wallet yourself. Never use a phrase supplied by a seller or support agent.
Keep the recovery phrase separate from the device. Anyone who obtains it may be able to take the Bitcoin, and anyone who loses both the device and phrase may lose access. Do not photograph or store the phrase in a cloud account. If you are moving Bitcoin from another wallet, leave that wallet intact until you have verified the new wallet and its backup.
Step-by-Step Instructions
Step 1: Check the device and install the official app
Inspect the packaging and device for signs of tampering. Type the manufacturer’s known official website address into your browser, then download the wallet app for your operating system. Check the app publisher and spelling before installing; avoid links in unsolicited emails, ads, or messages. Connect the device only as its manual directs.
Tip:A seller should never ask for your recovery phrase to activate or validate a wallet. Treat that request as a scam.
Check: The device and app start normally, and the app identifies the correct wallet model without asking you to enter an existing recovery phrase online.
Step 2: Create a new wallet on the device
Select the option to create a new wallet on the hardware device, not to restore one, unless you are deliberately recovering an existing wallet. Follow the device prompts to set a PIN or other local access control. Choose a PIN you can remember but that others are unlikely to guess, and keep it private.
Tip:Device setup wording varies. Follow the manual for your model, and confirm that the wallet is being created on the device itself.
Check: The device reports that a new wallet has been created and lets you continue to its recovery backup prompts.
Step 3: Record and check the recovery phrase
Write each recovery word in the exact order shown on the hardware wallet screen. Use the supplied backup card or a manufacturer-approved method, and copy the spelling carefully. Complete the device’s word-check exercise without looking at a saved photo, note, or online copy. Store the finished backup somewhere private and protected from fire, water, and unauthorized access.
Tip:Never type the phrase into a computer or phone, take a screenshot, or send it to anyone. If the backup card is lost or exposed during setup, follow the manufacturer’s guidance to create a fresh wallet and phrase before adding funds.
Check: The device accepts your word-check answers, and the written backup is legible, complete, and stored separately from the device.
Step 4: Open the Bitcoin account in the app
Unlock the device and pair it with the official app using the connection method in the manual. Add or open a Bitcoin account. If the app asks you to select a network, choose Bitcoin mainnet for ordinary Bitcoin transfers. Do not use a test network for funds you intend to keep.
Tip:Some wallets support several Bitcoin address formats or accounts. Follow the app’s prompts and use the account type supported by the service or wallet sending your test payment.
Check: The app shows a Bitcoin account and can communicate with the connected device. The device remains required to authorize protected actions.
Step 5: Verify a receiving address on the device
Choose Receive in the app and display a new Bitcoin address. Compare the address shown in the app with the address confirmed on the hardware wallet screen, character for character. Use the device-confirmed address when requesting a payment; do not rely only on the computer or phone display.
Tip:If the app’s address and device’s address differ, cancel and investigate before sharing either address. Malware can replace an address copied from the clipboard.
Check: The same Bitcoin address appears in both the app and on the hardware wallet, and the app can provide it as a QR code or text for the sender.
Step 6: Send a small test payment
Send a small amount of Bitcoin that you can afford to risk from a trusted source to the verified address. Check the first and last characters of the destination address and the amount before confirming at the source. Wait for the transaction to appear in the wallet and receive the confirmation level required for your needs. Network fees and confirmation time vary.
Tip:Do not transfer your full balance yet. A displayed pending transaction is not the same as a confirmed payment.
Check: The test payment appears in the Bitcoin account with the expected amount and address, and its status advances as the network confirms it.
Step 7: Test a small outgoing transaction
Wait until the test funds are available to spend, then choose Send in the app and enter a destination address you control or trust. Verify the destination, amount, and network fee in the app, then compare the key details shown on the hardware wallet. Approve only if they match your intention. Start with a small amount.
Tip:Bitcoin transactions generally cannot be reversed after broadcast. If any detail on the device is unexpected, reject the transaction and check the address and amount again.
Check: The device-approved transaction appears in the app and reaches the destination after network processing. You can also see its status in a reputable block explorer without revealing your recovery phrase.
Step 8: Store the backup and device securely
Lock the device and store it separately from the recovery phrase in places you can access if needed. Keep the phrase private and make any additional backup only using a method supported by the wallet manufacturer. Record where the wallet app and official recovery instructions can be found, without recording the phrase or PIN alongside the device.
Tip:Review the manufacturer’s instructions before updating firmware. Confirm the model and official update source, keep the recovery backup available, and never enter the phrase into a computer to perform an update.
Check: You know where the device and backup are, and no photo, cloud note, or shared document contains the recovery phrase.
Common Mistakes to Avoid
- Entering the recovery phrase into a website, app, or support chat. —
Enter a recovery phrase only on the hardware wallet itself, and only when restoring a wallet according to its official manual. Reject any request to submit it online.
- Skipping the address check on the hardware wallet screen. —
Compare the address in the app with the address displayed on the device before requesting a payment. Confirm transaction details on the device before approving a send.
- Moving a full balance before testing the wallet and backup. —
Send a small test payment first, confirm it arrives, and check that your recovery backup passed the device’s word-check process.
- Storing the device and recovery phrase together or in an exposed digital copy. —
Store the backup privately and separately from the device. Avoid photos, cloud storage, email, and unencrypted notes.
Troubleshooting
Problem: The wallet app does not detect the hardware device.
Solution:
Check that the device is unlocked, the cable or wireless connection is supported, and the app matches the device model and operating system. Restart both, then follow the manufacturer’s connection instructions. Download app updates only from the official source.
Problem: The app and device show different receiving addresses.
Solution:
Do not use the address yet. Disconnect and reconnect the device, reopen the Bitcoin account, and request a fresh address. Confirm it on the device screen. If the mismatch continues, stop and contact manufacturer support through its official website without sharing your recovery phrase.
Problem: The test payment does not appear.
Solution:
Check the sending wallet for the transaction ID and confirm it was sent on Bitcoin mainnet to the exact address you verified. Search the transaction ID in a reputable block explorer, then allow for network confirmations. If the sender shows no broadcast transaction, contact that wallet’s support.
Problem: The device rejects the recovery word check or the written backup looks wrong.
Solution:
Do not add funds until the backup is corrected and accepted by the device. Recheck each word and its position against the device prompts. If the phrase may have been exposed or cannot be verified, create a new wallet and backup following the manufacturer’s manual before funding it.
What Success Looks Like
The setup is complete when the hardware wallet generated its own recovery phrase, the device accepted your backup check, the Bitcoin account is on the intended network, and a device-verified address received a small test payment. If you also completed the outgoing test, confirm its destination and amount on the device and verify its transaction status. Keep the recovery phrase private and stored separately from the device.
Next Steps
Keep the device firmware and companion app current by following the manufacturer’s official release instructions. Before transferring a larger balance, recheck your backup and confirm that the destination service supports the address format you use. Review your storage arrangements periodically and after a move or a change in who can access them. If you suspect the phrase was exposed, use a trusted device and official guidance to move funds to a newly generated wallet; do not wait for an unknown person to contact you.
Frequently Asked Questions
Can I use a hardware wallet without connecting it to the internet?
The device can keep private keys offline, while the companion app may use an internet connection to check balances or broadcast transactions. Follow the wallet’s instructions for signing and broadcasting; do not type the recovery phrase into the connected computer or phone.
What happens if I lose the hardware wallet?
You can typically restore access using the recovery phrase on a compatible hardware wallet, following its official instructions. Keep the phrase safe: the device PIN does not replace the phrase, and anyone who gets the phrase may be able to spend the Bitcoin.
Should I test my recovery phrase by restoring it on my computer?
No. Do not enter the phrase into a computer or phone. Use the device’s built-in backup check or the manufacturer’s approved recovery procedure on a hardware wallet.
How much Bitcoin should I send for the test?
Choose a small amount that is meaningful enough to confirm the process but affordable to lose if you make an error. Check the amount and network fee before approving; a small transfer still uses a Bitcoin transaction fee.
Do I need to repeat the setup for every Bitcoin payment?
No. You can use the wallet for later payments, but verify the destination and amount on the hardware device for every send. Use a fresh receiving address when the wallet provides one, and confirm it on the device before sharing it.
Halloween Picks
halloween
As an affiliate, we earn on qualifying purchases.